Friday, March 22, 2013

Do we even need to Wide body?

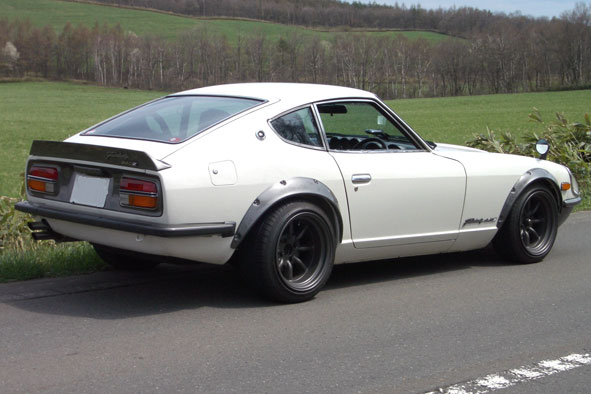
If we go with 15 inch wheels, we would be limited to a 225/50R15 tire. These would fit in the original wheel well perfectly. Example.


These also show off the Black banana style wheels better.

The only problem with this is I'm not sure if a 225/50 is a wide enough tire for our power goals.

Ideally, I would like to run a 245 width tire, but I haven't found a 15 inch tire that wide.

Honestly though, I'm not sure if it's the lighting but that might be the best looking S30 I've ever seen. The color is perfect, the wheels are perfect, the ride height is excellent. Twin exhaust stack and duckbill wing? Yes. If my Z turns out half as nice as this, I'll consider it a win.

Tuesday, March 19, 2013

Body: Other Wide Body kits

There's a couple other non-ZG style wide body kits available, but I think their all too aggressive for our needs.

The IMSA-GTU Wide Body


Molded in fender flares combined with a molded in wing and a variation of the G-Nose. Accommodates 11-14 inch wide wheels. This is a serious race quality kit that improves handling through ACTUAL aerodynamic tweaks. Very rare and hard to install. Requires a lot of tweaking to get right because if any of the panels are not aligned correctly the handling will be ruined.

The Arita Speed Wide Body


Kind of like a way more aggressive ZG flare, again with the G-Nose. Very similar in function to the IMSA kit. Also can be done without the G-Nose, but without the G-Nose your losing your main aero advantage.

We're not using either of these mostly due to cost and availability. Also, we don't need to be that wide. Regular ZG flares with cut wheel arches will allow us to run a 9 or 9.5 inch wheel all around with 255/4017's. More enough contact patch for 300-400hp. Any wider wheel or tire and we start talking supercar sizes and those are big money.

Friday, March 15, 2013

Body: First grind.

Not much of a post today. But we did get to play with a grinder and start stripping some paint.

Eventually the whole car will look like this and we won't find too much body filler.

Thursday, March 14, 2013

Body: Wheels.

There are two things we need to talk about with wheels, style of wheel and size of wheel. Lets start with style of wheel.

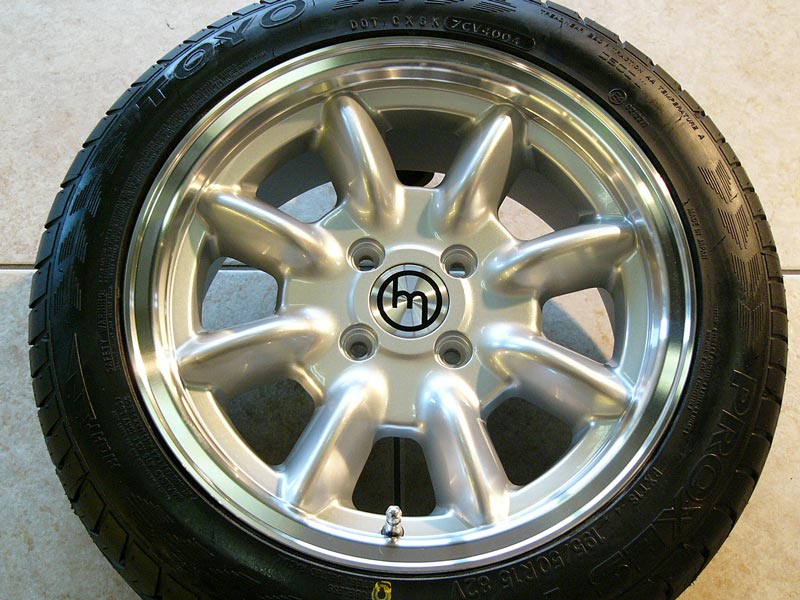
The vintage Japanese car does not respond well to giant wheels with rubber band tires that seem so common on the modern car. Small and wide wheels with tall sidewalls are the correct. Lets start by looking at what is one of the most iconic wheels in all of automotive history, the 8 spoke Banana wheel.

8 wide, round spokes. Called a banana wheel because the spokes....


.....Look like bananas. This is a British Minilite. Most fast, nimble British sports care ran on 13 and 14 inch Minilights. This wheel has been copied many, many times.


These are 15" Panasports. Another very popular Datsun racing wheel. Usually in a 15x7. Their light, and incredibly strong, but not quiet there yet.

What would Japanese enthusiasts have available? RS Watanabe. The Watanabe wheel has been in production since the early 60's and are custom made, so you could get them as wide and in what ever low offset you needed. Want a 15x12 rear wheel for your Skyline? Sure. Want a 16x8 front wheel for your Datsun? Of course. The low offset and wide wheel made the Watanabe sand out from the other banana wheels.


There are other good vintage style wheels though.

The Hayashi is available in a staggered setup. 15x8 in the front and 15x9 in the rear.


Maybe a modern wheel like the Grid? Comes in a wide low offset, and all kinds of colors.

So what about Size?

Our factory wheel would have been a 14x5.5 with a 185/70R14 tire.

Depending on whether or not we use the rivet on flares, our ideal wheel width is 8", maybe a 9" wheel in the rear.

But what about diameter? I've always felt that going more than a +2 is too much, so that means the biggest wheel is a 16". Problem though. No good tire options in a 16" size. 15" isn't much better. So, do we go to 17" and get better tires for less? Does a 17" Banana wheel look good on a Z?


I worry the 17" is a little too big, making the car look like a Hot Wheels toy.

So that's where we're at. We haven't decided on wheels, but we have a long way to go. Most likely we will do one of two sizes/styles.

15x8 Black Banana Wheels with a 225/50R15 tire
or
17x8 front 17x9 Rear Black Banana wheel with 225/45 Front and 245/40R17 Rear.

Wednesday, March 13, 2013

History: Fairlady Special Models

So in order to talk about what a 70's Japaneses tuner owned car would look like, we need to look at the Japan market cars, and the three special models that all kind of roll into one look. First of all, the 240z was referred to as the Fairlady Z. That would be your standard 240z with a 2.0l Inline 6.

First, the Fairlady ZG.

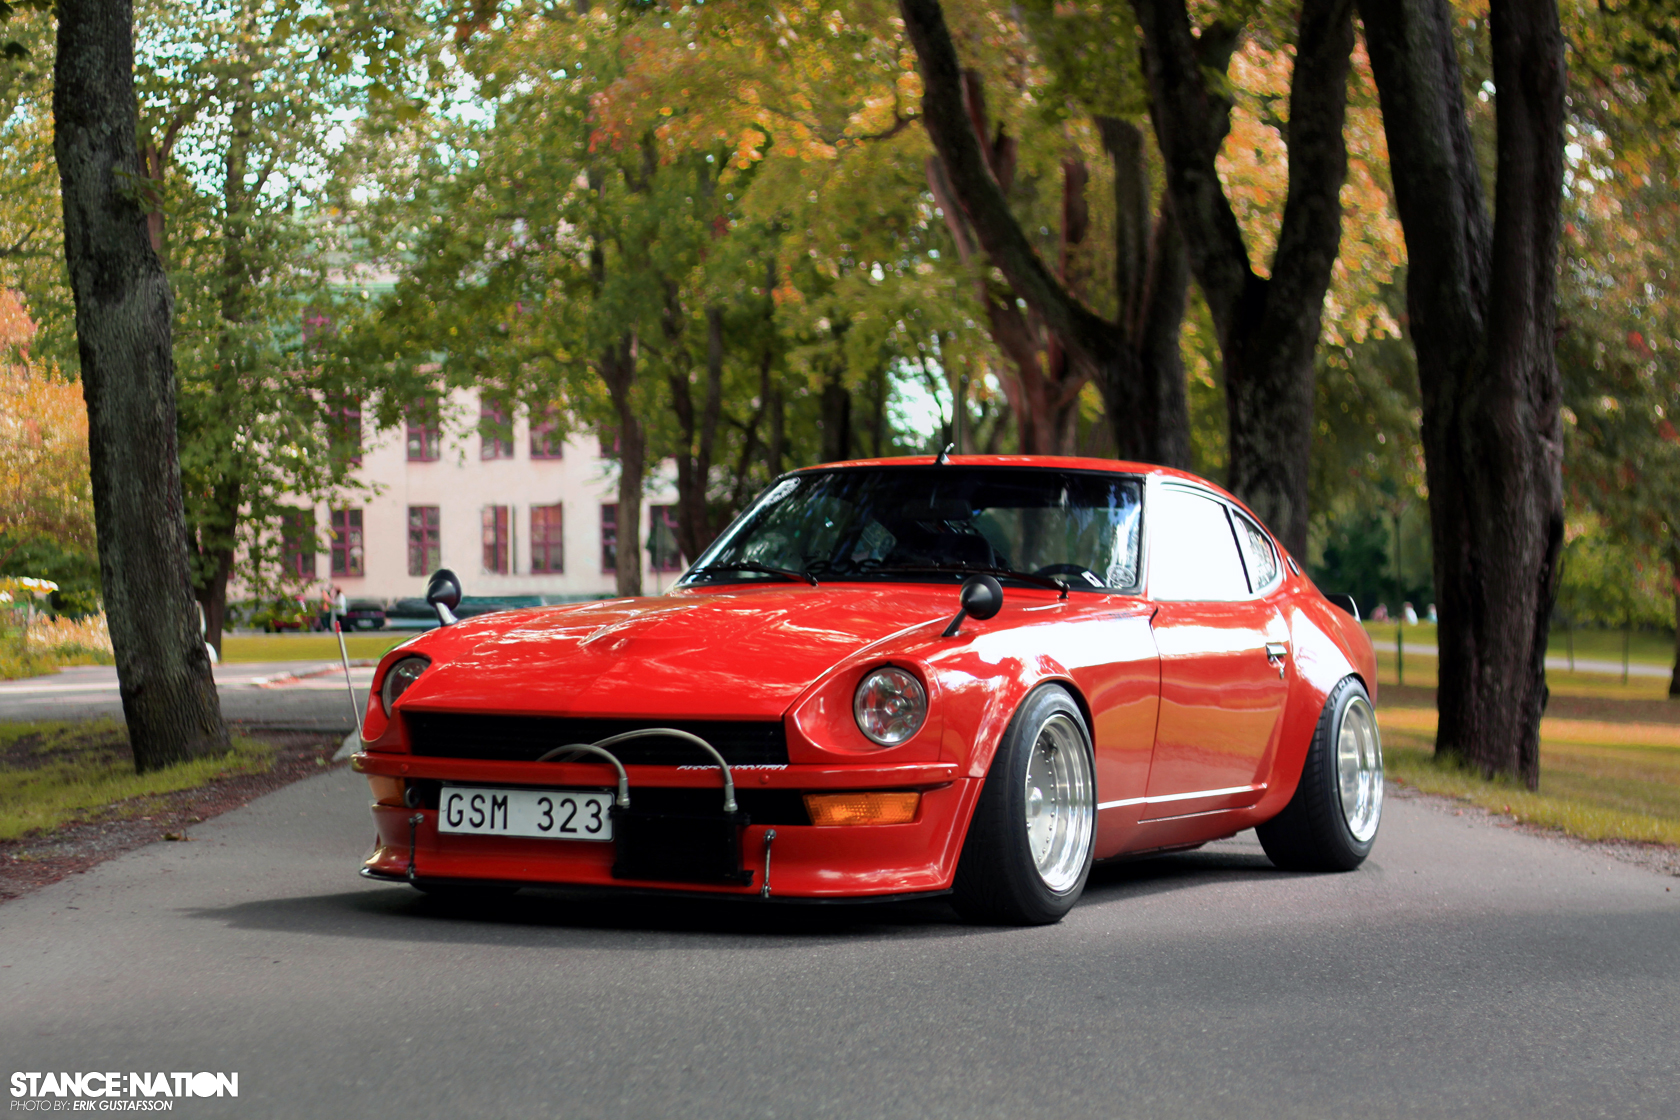
In order for the Fairlady to be competitive in Group 4 GT Style racing some body modifications had to be made. In order for the changes to be race legal, they had to be on the street car as well. The "G-Nose" with it's extended nose and headlight covers were much more aerodynamic than the open air scoop on the standard 240z. We'll be addressing that with some home made engineering later. The Rivet on wide-body flares were purely cosmetic on the street car, but the race models had the body and wheel liners trimmed to allow for proper race wheels and tires almost three times as wide as the stock 14" tires. The engine remained the same, as most race teams had race legal engines they wanted to use.

Fairlady Z432.


The Z432 was a special edition created by using the 2.0l S20 from a Skyline GT-R making about 160hp. The 432 stood for "Four valves per cylinder, Three carb's and Two camshafts. Used S20's sell for $10-15k.

Fairlady 432Z-R

Looked the same as the car above, but only in a darker shade of orange and only with black hoods.

The 432Z-R is a VERY rare and VERY special model. Only 30 were made and only 20 still exist due to crashes. The 432Z-R was a competition only car made for and only sold to licensed race teams. Made for Rally circuits, the engine was the same S20, but tuned to whatever the race teams needed. Weight was heavily reduced, using thinner sheet metal and Lexan windows that kept curb weight below 2000lbs. Roll bar style cage was standard. No power brakes, because rally car's didn't need them. The most hardcore factory Z ever made.


So, what do we need? Depending on our wheel and tire choice, we pull the ZG flares and mirrors. 432Z wing. Lower chin spoiler, but not the G-Nose. Those black wheels are aftermarket, but I'll be talking about those tomorrow. In the end, we paint it all white, with black flares and we get this.


Tuesday, March 12, 2013

Body: Vintage style exhaust.

I mentioned yesterday that the exhaust would be period correct. I've used the term "period correct" a few times, but I've never talked about what that means. The idea is to make it look like it would look in the 70's.

More specifically, what would our car look like on the streets of Japan in the late 70's? We'll talk about the body and style later, for now I want to talk about the exhaust, more importantly the muffler and tail pipe. This is a very important part of the style and sound of this car.

Lets look at a stock 240z to compare to.


This is all I can find. Single pipe from the manifold back. One resonator (11) and one large vertical oval muffler with a single tip. Very boring.

The under vehicle portion is simple. Single resonator (kind of like a muffler) with homemade piping. Lets look at some vintage exhaust setups.

The popular look at the time was Dual Stacks. That's two exhaust tips stacked vertically. Like this.


You can see one glasspack (tube style) resonator and one large oval muffler with two slash cut tips.

Then you have things like the Fujitsubo Legalis. This is a full exhaust with twin tips, very simple and one of the best sounding units. Although, I think it looks a little boring.


Like I said, kind of boring. Also, not race car enough. How about a real race car style exhaust?

BRE style. A Y-Pipe splitter branched off to two trumpet exhaust pipes. Awesome, but too loud for our needs.

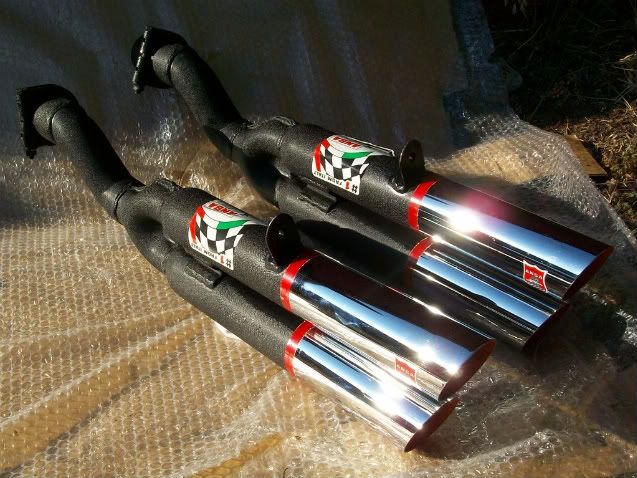
No, what I need is something home made along these lines.


These are out of production, but their not hard to make. A Y-splitter, two short glasspack mufflers and two slash cut tip's. Resulting in something like this.


Maybe put a slight bend where the tips meet the glasspack so they point a little upward.

Monday, March 11, 2013

Basics of swapping a modern engine into our vintage chassis.

Once we decide our engine and transmission we have to mount it safely in our chassis. lets look at the finer points of the swap process.

Engine and transmission.


  • All of our engine choices fit very well so there's no frame modifications to be made. All of the engines have the same basic mounting process. We buy a custom made engine cradle and weld the cradle into our chassis.
  • Pictured to the right is the engine cradle and crossmember for the VQ35 swap. The grey cross bar welds on top of the frame acting as a brace stiffening our chassis and the red stands bolt to the motor and the cradle.


  • Here's the cradle installed with the motor in place. Notice the factory crossmember has been notched Basically, a section was cut out with a plasma cutter then it was boxed in so it's still stiff. Since the engine cradle acts like a crossmember the factory crossmember is only there to hold the steering rack and for the lower suspension to attach too. The VQ35 is the only swap that requires that.


  • Transmission mounting is simple, that black bar is a transmission crossmember style mount. Once the engine and transmission are in place the transmission mount bolts in.
  • The driveshaft will probably need to be made. The transmission will need either a splined shaft or a flange on it, and our differential will need a flange on it. The length of the driveshaft all depends on how long of a transmission we use. It's easy to measure and shafts are easy to get.

Once these steps are done the engine and transmission are physically mounted in place and are good to go.

Cooling.

  • Now that are engine is mounted, we need to run coolant through it. Again, this process is fairly similar to all engines. Mount a correct thickness radiator and run coolant hoses to engine. Depending on how far away our engine is (V6 or Four cylinder) we might need to make coolant pipes since 3-4 foot straight radiator hoses will be more likely to fail.
  • Once the radiator is plumbed in, we need to make heater hoses to go to the heater core in the cabin through the firewall. While we most likely won't have A/C with our swap we will retain the heating system. This is optional, but I feel like there's no reason not to take the time and have a working heater.
  • Depending on our engine there will probably be little cooling lines to the manifolds and throttle bodies. These will most likely come with our engine.
  • Not only do we need to cool our coolant, but our engine oil as well. True vintage racing car shakotan style is to have an external oil cooler mounted on the outside of the bumper.


Not sure if we'll go this extreme for daily driving use, but a small wire mesh cover on that cooler would protect it from small rocks and debris.

Electrical.
  • To start with all of our wiring is 40 years old and from a time where electricity was dark magic created by time wizards and cased in black boxes. We know more about automotive electrical now, so we can make sure we have enough and it always works. Ask a vintage British car owner about their wiring and they'll either punch you or sob quietly in a corner mumbling about "points" and "tube fuses".
  • All of our engines are fuel injected with computer controlled ignition. Our original car was carburated with points style ignition and distributors. In order run our new engines we need to run new thicker wires and connectors. The engine will come with a wiring harness that will connect to an Engine Control Unit, or ECU. The ECU will need constant 12v, switched 12v (ignition switch) and a chassis ground. We're going to mount our battery in the trunk so all these wires will be custom cut for our chassis. 
  • The VQ needs a lot of other wiring done, but it's all simple once the parts are together. All the extra unused control modules and wiring just need to be connected to the ECU. We can zip tie them together and tuck them behind the sash board.
  • The basic idea is to have two wiring harnesses for the car. A chassis harness that controls lights, radio,  and accessories and a separate engine harness that powers the ECU and starter. our gauges will be tapped into the engine harness for their input signals and into the chassis harness for their power.
Fuel.
  • Because we have a 260z we have a fuel tank from the fuel injected 280z. That means it is already baffled. Under hard cornering 240z's would get fuel starvation because the fuel pick up would dry out. This doesn't happen with 260/280z fuel tanks.
  • Our original system was carburated with a mechanical fuel pump that operated at fairly low pressure. The more fuel was needed, the higher the pressure would go. Even at its highest flow rate the factory pump was very low pressure, about 8psi. A fuel injected motor needs 40-45psi at the fuel rail. A simple frame rail mounted electronic fuel pump will provide as much fuel as we need.
  • One or two hard fuel lines will have to be made and run from the fuel pump to the engine bay. Then braided soft lines from the hard lines to the fuel rail. The number of lines depends on if the engine needs a fuel return line or not.
Exhaust
  • Depending on whether or not we have a turbo the exhaust is fairly easy. All of our engine choices have exhaust manifolds that fit in our bay. 
  • I'll be detailing our muffler choice later because it needs to be period correct since it will be visible during everyday use.
  • We need to make one or two pipes that will go from the outlet of the factory manifolds and terminate at the rear muffler. This exhaust will be sectioned with flanges so that a resonator can be bolted in to control sound levels if needed. If we run a turbo, piping will be 3" wide with as little bends or restrictions as possible. No turbo's means slightly smaller piping.
So with those all addressed we will have a car that moves under it's own power. Not done, but at least it would move and drive.