Sunday, December 29, 2013

I haven't forgotten.

I have not forgotten the project, nor have I forgotten you the reader.

Some delays have appeared. Some of you know me in person. You know what's going on. For the passer-by my Wife/Assistant is pregnant with our first child. Our Daughter. Sophia Jean. Sophia has already been a bit of a problem child, causing my lovely wife to spend a couple of weeks in the hospital leading up to the delivery date. As I'm sure many of you would agree, my priority's have shifted a bit. My weekends have been spent building a pretty awesome nursery and getting our house ready for the greatness that will be Miss Sophia Jean.

In all this excitement, I have gotten a very small amount of time spent getting the car ready for the next step. And there will be a major update post soon. The engine bay is almost done. I need to remove the hydraulic brake lines and weld the panel in. Finish grinding the paint off the rear and then I can start the primer process.

In the mean time I can announce that I've made some hard goals that I will be adhering to and building towards.


  • White. Flat black. Gold. Simple. BRE Wing, Xenon Front air-dam. That's it.
  • No flares (for now.)
  • No A/C, but working Heater.
  • Daily drive-able. Needs to be driven to Car's and Coffee in Blackhawk. About a 40 mile drive one way, and I don't want to beat up and exhausted when I get there. That also means no coil-overs. A use-able suspension.
  • RB20DET. 5-Speed. 300whp, 8000rpm. Wide power-band and rev's for DAYS.
  • Throttle Response will be Key. That means, basically, using factory turbo and parts to hit out 300-350 wheel horsepower goal. Make our 2.0l engine perform like a bigger, non-turbo motor. This is hard to describe, but imagine V8 non-turbo horsepower and torque out of our measly 2.0l motor.
Keep your ears open. The time is nigh, and a major update is coming. The die is cast, and our plan is made. 


Be well readers. The new year is coming. As The Wise Man Said, 


"Don't you Worry 'Bout a Thing", released in 1974, the same year as our 260z.


Monday, October 21, 2013

Craigslist!

Ebay isn't the only place to bargain hunt for parts. Craigslist is a great resource too.


Behold our new (to us) Urethane Air Dam. Brake ducts to keep our front brakes cool. A good lower chin spoiler will help direct airflow where we want it.


You can see it zip tied in place it's a great fit.

We also got some new quarter windows that match. One of our old ones was cracked, and they didn't match tint/sun fade wise.


So, we got a $300 air dam, and at least $50 per window for the grand total of $100. It did require driving about 2 hours each way, but that's whats great about project cars. They give you an excuse to go on long trips to places you wouldn't normally go.

Tuesday, October 15, 2013

History.


This is an excellent primer on the history of Nissan/Datsun and the entire post-WW2 Japanese auto industry.

Produced in 1995-96, it's a little out dated, but it's a great 47 minute history lesson.

Sunday, October 13, 2013

Hello? Is it me your looking for?

Look. I know it's been a while. In the last two months I've judged TWO car shows, built a nursery, quit my job, got a new job and yet I still found a little time here and there to get the car to about 90% bare metal.


The Blue isn't the top coat of paint, there's a blue cot on the wall that is giving some reflection.


So, where are we? What's left? Lots, but just to get primer down we need to

  • Remove the inspection lids (the hinged lids next to the hood). They are warped beyond repair. Going to replace them, maybe with louvered lids to help expel the under hood heat.
  • Finish grindering the rear of vehicle.
  • Weld the hole shut in the passenger front wheel well.
  • Drill out the rusted screws that are keeping the quarter panel windows and trim in.
  • Strip the engine bay. All that's left is a few electrical relays/modules and the brake hydraulics.
  • Remove the window wiper motor and tracks.
  • Mask/tape off the chrome window trim.
  • Drop the gas tank to remove the safety bumper supports. Patch the holes in the rear shut.
  • Get a front spoiler and wing.

For the interior we have a smaller list.
  • Remove that rusted out heater system. 
  • Remove the last few relays and vents from the passenger firewall area.
  • Remove the last bit of electrical wiring from the back.
  • Scrape what is left of the headliner padding off the roof.
Once the primer is down, it's sand, sand, sand and more sanding. Multiple coats of primer and sanding. 

You'll notice that cutting and fitting flares not on the list. A shift in thinking for this project. No more classy street driven race car. I'll get into it later, but this car will be driven on a more regular basis than originally thought. That means no rotary that needs constant care and rebuilding. Turbocharged Inline 6 power inbound, once the bodywork is done of course.

Monday, August 19, 2013

Call me the Kaiser, because I'm on a roll.

The heat has not slowed me down that much. Made some great progress on the interior.

Went from this....


To this.


Scraped about 20lbs of tar and wool insulation.What you see is 5 minutes of grinding away from bare metal.


Next step is to cut those small holes out and weld in a new sheet. I'm going to use the front bumper that I took off as a panel. Recycling in the purest form. Don't mind the three round holes, those are supposed to be there.


I also took a wire wheel to the frame and firewall on the battery tray hole area. Happy to report that the frame is in very good shape. I think I'm going to clean it up and weld in a piece o sheet metal in from the bottom. Haven't decided the best way to tackle it yet.

Friday, August 16, 2013

Progress update!

Progress is slow, but it's progress none the less.


Lower bumper, side bumpers, grille and bumper supports are off and gone. Aftermarket front air dam will replace all of that.


Vehicle is on stands, wheels are off, right headlight is out.


Left headlight is still stuck in.


Windshield is out and disposed of, was heavily cracked. Dashboard is out.


Rear windshield is out and set aside. Quarter windows are out, one was broken during removal.


Engine bay about 90% stripped. Only needs brake and clutch cylinders removed. Also started on my rust hole. Entire engine bay and dashboard wiring harness has been removed from vehicle. Wires were very cracked and falling apart. Vehicle will need to be rewired for the new engine anyway so it's not that much more work to rewire the dash and cabin.


My rust hole is looking good, but still needs some touching up before a new panel is cut and formed.


So. We're getting there. Need to remove the hood, patch the engine bay rust hole and I can probably primer the engine bay.

Wednesday, July 17, 2013

Engine: Rotary? Why would anyone want one of those.

While having dinner with a blog reader, the topic of the car came up and I heard her say....

"Your not really going to put one of those......rotary engines......  in your car are you?"

There is no visual text that implies the disdain on the word rotary but it was there. Apparently my friend thought (like almost everyone) that the rotary engine is a bad engine that's time had come and went. Even went so far as to insinuate that I might as well put an electric motor in there.

After some discussion I think I turned her, but what about everyone else? Would everyone turn there nose at my spinning triangles?

I figure I should get some of the great myths dispelled now while I can.

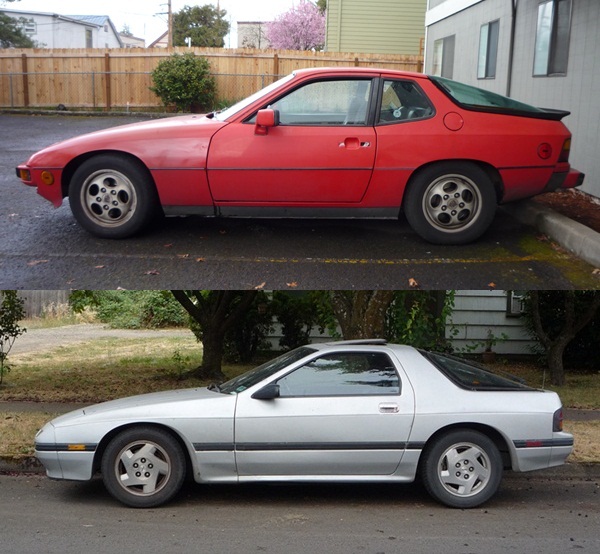
1st.) Unreliable. "My friend had a sister that had an RX7 one time, it went through three engines before they gave up on it.

Every car person has thought about dancing with an RX7 at some point, but was probably scared away by
the horror stories of blown seals and leaking coolant rings costing entire engine rebuilds. The fact is most rotary failures are preventable with  correct maintenance and care that all high performance cars should have. When Mazda released the first turbo rotary in the US it was aimed directly at the Porsche 944 Turbo. It cost significantly less and in turn stole a lot of sales. The problem was, the turbo rotary is a legit race car engine turned down to a 4. It runs on air, fuel and oil. There is literally an oil injector in the block to spray the apex seal on each rotor. No one told the secretary's and 30 year old business men that and motors ran low on oil and popped.


When the twin turbo 93-95 RX7 came out, again no one told the people buying Porsche performance at Mazda prices that the cooling system was inadequate and the wiring was thinner to save on weight and it is supposed to consume a quart of oil every gas tank. Car's lost there first motor in the first year due to neglect.


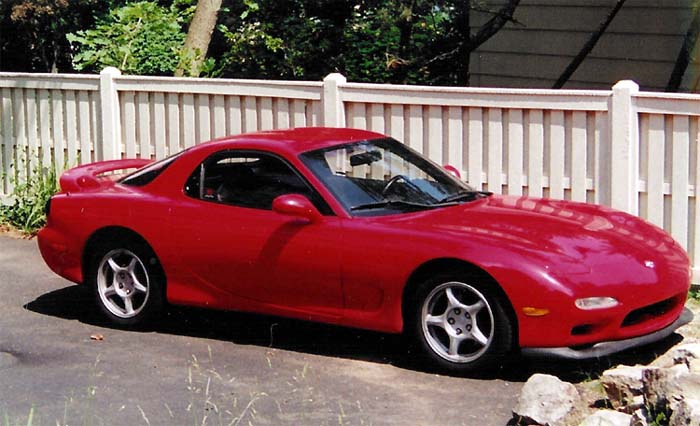
Mazda almost went bankrupt on warranty claims. Ford bought them and said no more rotary engines and in 95 we lost out on the rotary until 2003 when the RX-8 debuted.

The truth? It's not an unreliable motor. It simply requires a watchful eye. I've owned a few RX7's. One had 200k miles on the original motor. You know why? Oil was checked at every fill up. I always rolled with a gallon of coolant and 4qts of 20w-50 non-synthetic.

The Rotary powered Datsun should only see 5000-10000 miles a year. It will be a special occasion driving it. Of course the fluids are going to be in good condition and topped off. Of course there will be air flow across the radiator and intercooler. We can design airflow channels for that.

Reliability in any car is only as good as the person maintaining the car. Not worried.

2.) Power. But doesn't an "INSERT WHATEVER MOTOR A PERSON LIKES" make more power?

Probably, but does your motor have the potential to make 300-500whp on stock internals, rev to 8k daily, weigh less than 300lbs dressed with transmission and is smaller than most suitcases? Oh yeah, it looks awesome too.


3.) Noise. Isn't it going to be loud and buzzy?

Yeah, but with correct muffler choice it will sound like a real race car. Buzzy? Not sure that's a word. No it won't. Rotary engines by design are insanely smooth engines. There is no up/down force to cause vibrations so no buzzing. The only buzzer is the one Mazda installs to remind you to shift because you won't feel a rotary engine at full bore. It's that smooth.

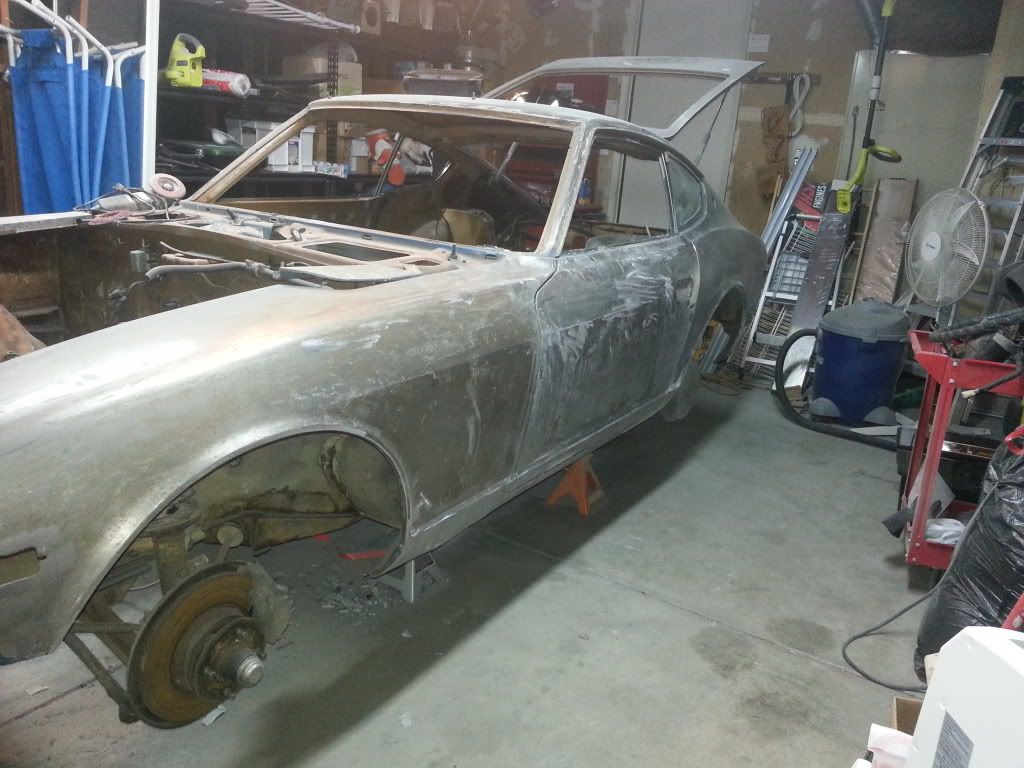
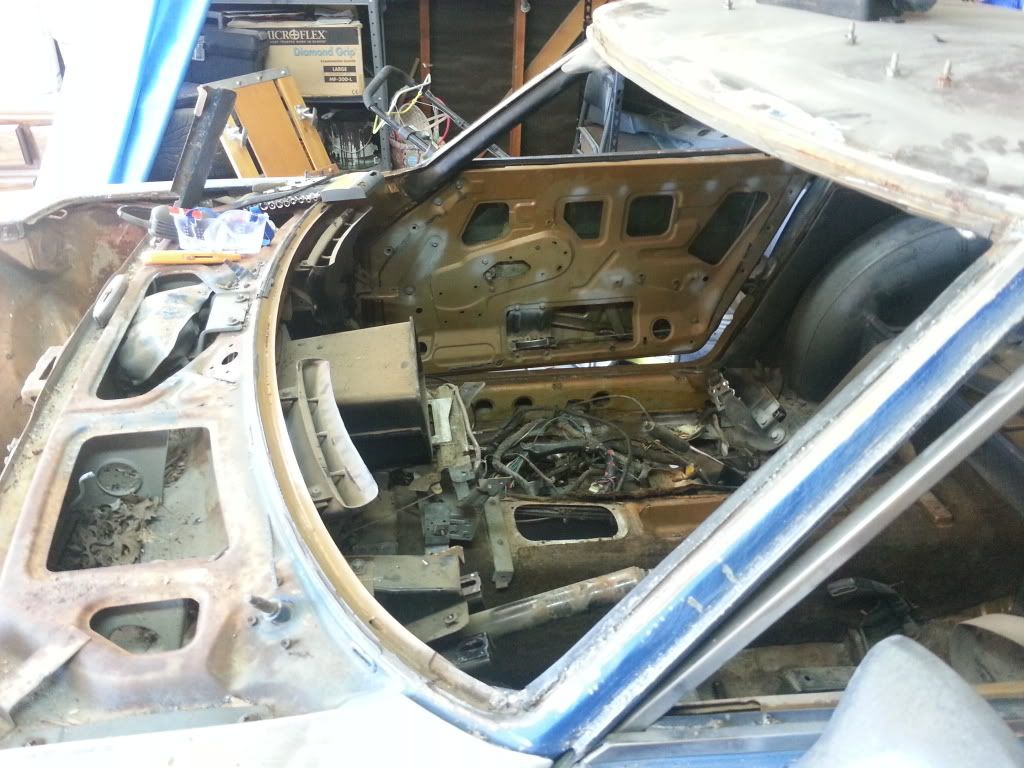
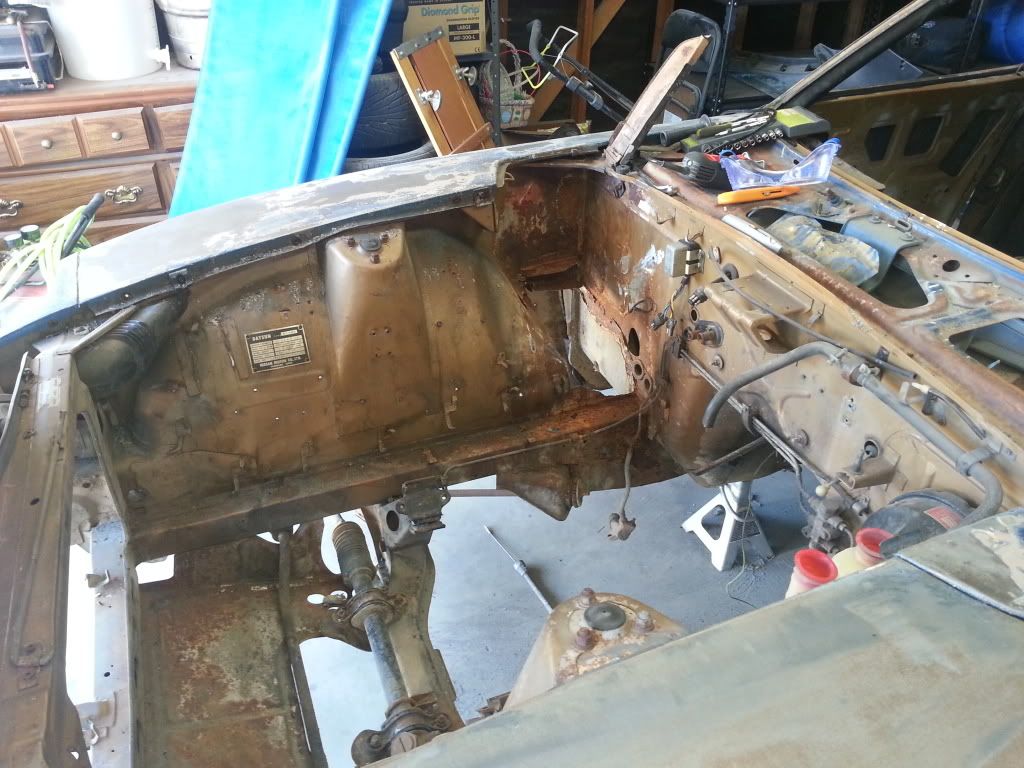
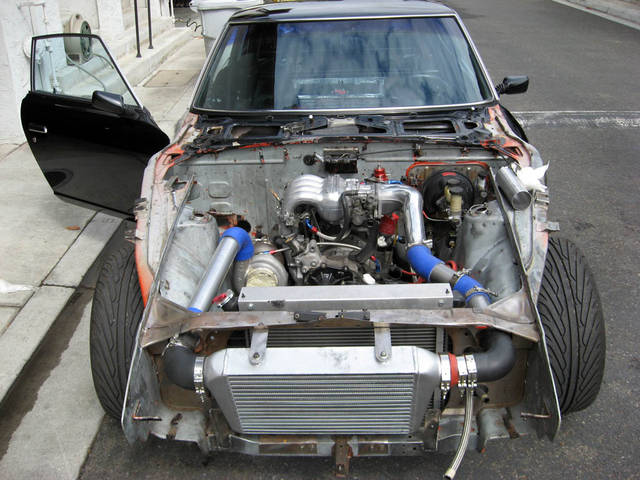
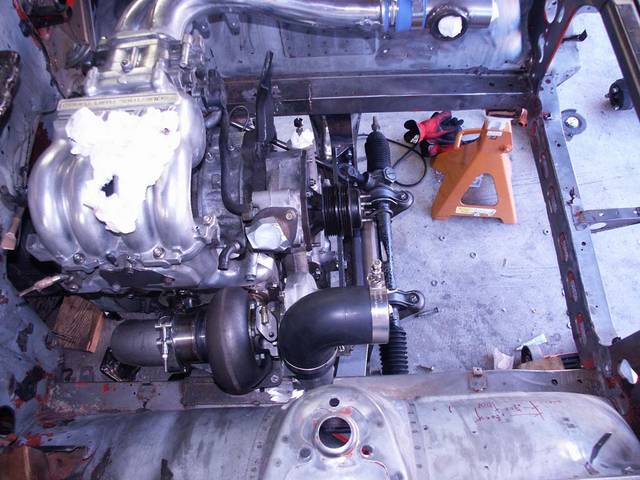
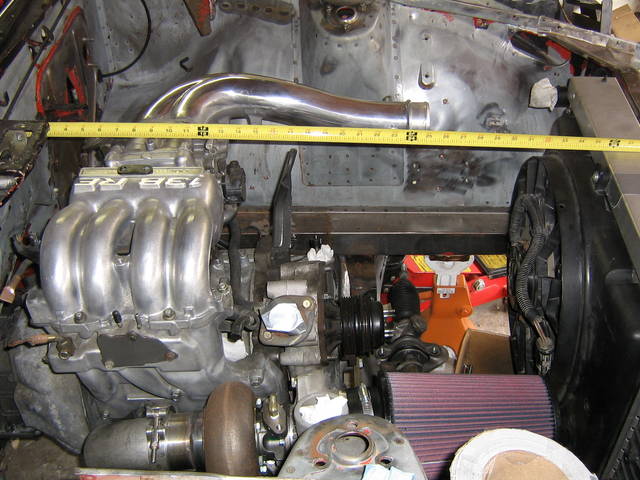
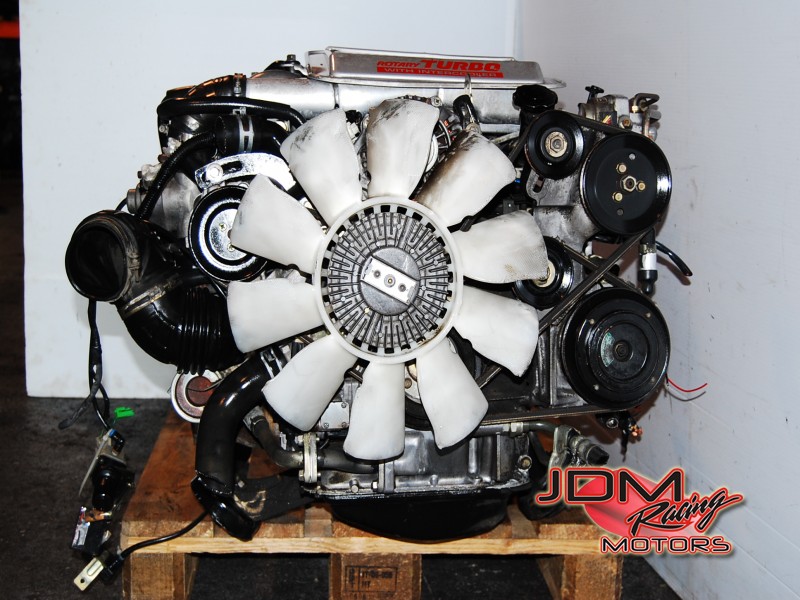
At this point I'm rambling. I haven't even test fit one yet. I know it will fit, and hope to have a dummy keg (equal to a block, you'll see when I put it together) in the next few weeks. I know it will fit because I found these.


For those playing at home, that ENTIRE MOTOR is only about 17 inches front firewall to timing cover. And it makes 300hp. Of yeah, it's only 1.3l.

To sum up, Rotary engines? Yes. They rock. Keep it clean, keep it full of oil, and your gold. Think I'm nuts? Sound off. Talk me out of it.

Sunday, June 30, 2013

Body: More Gel stripping.

So the roof is done, aside form the window frame edges. Waiting to do those until I can find a safe way to remove the chrome trim. Have to be careful because replacing those rain guards is expensive since their out of production.


Now that the paint is gone, we can try to fix that dent above the passenger door. Hopefully dry ice and a heat gun will make pull the dent. More on that later.


The hood is at about 90%. The bottom edge needs some more gel. Had to stop though. Once the sun hits the metal it gets too hot and the gel melts/evaporates before it can work it's voodoo magic. For the most part, no surprises on the hood.

The stripping gel does have one odd affect that I need to figure out whats up with.


On the left, a section of hood that was grindered with an abrasive stripping disc. The right, stripping gel and a straight edge scrapper.

Their both bare metal, but I worry that there's a noticeable surface difference that will affect primers ability to grip into the metal. I suspect I still need to grinder over the car, but now there won't be 70lbs of lead paint dust in my garage.

Also, looking into hood scoops. Thinking about the Datsun Competition Scoop. Requires a big hole cut in the hood, but a great way to let hot air out of the hood, and maybe even help with aerodynamics.


Thursday, June 27, 2013

Wednesday, June 26, 2013

Body: Update, paint stripping!

Oh man. Game changer. So it took me an hour to do half the roof.. I did this tonight.


That's the other half of the hood. I did this in about 30 minutes. Not done, but damn close. How'd I do it?

With this.


You let this super stripper gel soak on the surface for 15 minutes and the paint starts to do this.


Then, this.


It bubbles and lifts off the surface. It pulled a base primer, factory paint, aftermarket primer and aftermarket paint up. By separating the primer from the bare metal it makes it possible to pull the paint off in strips with a scraper.

This will speed up the stripping process big time. Now instead of grinding on the entire body I can simply grind in a few small touch up sections.

Tuesday, June 18, 2013

Engines: 13b Rotary. No really!

Sorry for the long gap. New job, summer heat, sisters wedding, blah blah blah. I'm back for a little while.

While I was off, I kept thinking about engines. Yes, the RB25det will be a great choice. We have a crossmember and everything.

But then I saw this.


So, when I first thought about a rotary I thought about the two really big dogs. The Twin Turbo 13b-REW and the 20b-REW Three rotor. I forgot all about the TurboII RX-7 that had a single turbo 13b-RE making about 200hp. What interests me is those engine mount brackets. See how they angle diagonally. Very similar to the crossmember for the RB25det I have.


With a little bit of work, it might be very possible to put a 13b in our chassis. The 13b is a very desirable choice due to it's low size and weight with big power potential. A fully dressed turbo 13b with transmission should weigh in around 400-450lbs.

Why a 13b? Is it any good?

Very good. A healthy 13b Turbo with a proper setup can put 300-350 wheel horsepower down with lower boost numbers thanks to the unique way the rotary engine spins. The also sound amazing. Plus there's only three moving parts.


Listen to this sound.


So, there's still some measurements to make to see if my theory is right.

Sunday, May 19, 2013

Slow progress is still progress.

So turns out I can't use a grinder for more than 30-45 minutes before my hands give out from vibration. The left rear quarter panel and half the roof are bare metal.

More grinding to go. I did find more body filler in the roof which is odd. Means more body work that will be needed after primering

Tuesday, April 30, 2013

Progress.

Not much to report. More grinding. Left quarter-panel is bare steel. Still need to hit the right quarter-panel and the roof. Should get more time this weekend to make some magic happen.

Still to do.

Grind quarter-panels to bare steel.

Remove weather stripping and grind tail panel to bare metal.

Grind roof to bare steel

Remove glass and weather stripping from hatch and grind to bare metal.

Remove weatherstripping and grind door jambs to bare metal.

Strip doors, fenders, hood and headlight buckets to bare metal.

Strip engine bay of wires and unnecessary components and prep for paint.

Dry ice interior and remove sound proofing.

Weld in patches to cure rust.

Fabricate new inner wheel well liner.

Modify body for flares.

Acquire front air dam and rear spoiler

This all has to be done before the paint process can start. I'll cross things off as we go.

Monday, April 22, 2013

Spark's.


So, I bought a welder. Now there's no stopping till we're ready to primer. We should be able to prep and repair rust. Looking to make some serious progress this weekend.

Wednesday, April 17, 2013

Body: How this is going to go.

I thought with us starting to strip our body down, now would be a good time to lay the process out so that we make sure not to forget anything.

Step 1. Strip our chassis down to bare metal. This includes the interior. Step one is the longest step. The interior needs to be dry-iced. All paint and body filler needs to be stripped. The engine bay needs to be stripped of all the now unnecessary lines and hoses.

Step 2. Welding. Repair the holes in the floor boards. Plug the antenna hole. Fix the fender liner and remove the battery tray. Weld shut any holes in the firewall that are no longer needed. Fix the seat brackets.

Step 3. Repair any major dents as best as possible. If we can't make it perfect, we'll use body filler to make it smooth later.

Step 4. Remove hood. Remove fenders. Remove front lower valances and grill. Remove doors. Remove hatch. If any of those parts are damaged beyond repair, replace with fiberglass if possible.

Step 5. Clean metal with acid. Lay down 1-2 coats of rust encapsulating etching primer. This will adhere to the bare metal. The interior will get a rust encapsulation primer as well, but a much thicker coating to help with noise.

Step 6. Body filler for any dents that weren't made perfect during step 3. Body filler will adhere better to the primer.

Step 7. 1 more coat of primer over the car over the body filler. Maybe 2 if needed.

Step 8a. Light sand the primer and lay down color. All door jambs, interior under the carpet and the engine bay will all be the same color.

Step 8b. Light sand and color again. Depending on the paint and the color we will have to sand between coats and we might need a clear coat.

Step 9. Reinstall painted fenders, doors, hood and hatch.

That's pretty much it. Interior can then go together, and assembling the engine bay is it's own ball of work.

Sunday, April 14, 2013

Body: Progress is the sound of a grinder.

First things first, we built an engine stand.


Rated to 1000lbs, this stand will hold any engine we can mount on it.

Short story, watch this.


For more about, what we did read on.

We got to our first day of working on the car. After stripping emblems and light fixtures, my trusty assistant got to work removing the taillight panels.


The end product of her hard work?


No hidden rust in our taillight panel.

After about an hour of grinding we were at a stop. We made some good progress though.

Right side.


Left side.


Unfortunately, we did find some not so great things on the left side.

See that white on the border of the paint? That's body filler. The sheet metal is dimpled. It's hard to see in pictures and in the video, but it's there.


Friday, April 12, 2013

Learn about Kaido Style.

http://www.speedhunters.com/2013/04/the-anatomy-of-the-kaido-racer/

Enjoy this lovely article explaining what the current Kaido style is over in Japan. We won't be going full Kaido, but I have always been fascinated by these cars and I'm sure some Kaido influence will seep in. This is what makes me want to run the front mount oil cooler.

Wednesday, April 10, 2013

Engine management and ECU's.

So we talked about fuel. The other thing needed for engine propulsion is spark and that's easy. The factory system uses a coil-on-plug setup. That means each cylinder has it's own spark plug and coil with no distributor. The factory system is very robust but if we need a cleaner spark there are plenty of aftermarket coil's or we can retrofit coils from another car. The coils are driven by the ECU (engine control unit).

In order to understand how important the ECU is, lets take a minute and talk about what it takes to make an engine not only run, but make tons of power.

The ECU takes inputs from the crankshaft and camshafts as well as various sensors around the engine bay to determine how much air and fuel are needed at any time. Example; when you first start your car. It's cold. The ECU reads the temperature of the air coming in and add's more fuel and raises the idle so that the engine heats up faster. You go to leave your parking spot, the ECU monitors throttle position, engine temperature, air temperature, fuel pressure and the amount of air coming in and adjusts spark and fuel to accommodate your driving. Once the engine warms up, the thermostat opens and coolant flows through the radiator. This signals the ECU to lower the fuel going in. Now your on the freeway. The ECU is monitoring engine speed, throttle position and air coming in. You stab the pedal to pass, the ECU calculates the air coming in and adds fuel to mix it to a perfect air/fuel ratio.

Oh yeah, it does all those calculations IN REAL TIME. It manages 4-8 inputs and outputs at any given time, and it's only the size of a double disc CD case.

So now that we know how complicated of a box it is, how can we make it better?

Piggy Back

If the factory ECU is does all of that, and is only "good" we need to work hard to make it better. The easiest option is to use a piggyback system and trick the ECU. By using a small collection of other black boxes we can trick the ECU into giving more air or fuel. Basically we make the ECU think it's giving us 1 part air and it's actually giving 3 parts air. This is a messy way to go about things, but it's cheap and functional. The setup would consist of a electronic boost controller to adjust turbo pressure and an electronic Air/Fuel adjustment controller. The amount of fiddling would be ridiculous. Cost wise this could run $150-300 a computer so up to $600.

Nistune

Nistune is an interesting option. We take our factory ECU and we add a circuit board that would allow us to connect a laptop and adjust air/fuel ratio templates and monitor sensors in real time. These templates are referred to as "maps" as in fuel/RPM maps. This system allows for maps to be downloaded and uploaded so we could find someone with a similar system and install their maps cutting down on setup time. The only downside is there is no Nistune dealers in our area so we would be on our own for optimizing and tweaking the maps. Nistune does not require a new ECU or any special wiring on the car's end. A Nistune licence and control software usually costs between $500-600.

Full Engine Management Solution.

Haltech. Greddy Emanage. Apexi PowerFC. These are full management systems that require a lot of rewiring. Their complicated, horribly expensive ($1200-1700) and incredibly sensitive to adjustments. However their level of adjustment makes them a must for the 500-700hp crowd. Also, requires a good shop who knows the software to really dial a car in. Way more than we need.

Why not the factory ECU? For now that's probably fine. It'll run, but if we want to get the most out of our fuel and spark and air combination we need some adjustability in the ECU. Think of it this way. On an RB25 the factory ECU will get it running smoothly at 250hp, but the exact same car with a dialed in Nistune would be 300-320hp and would have better fuel economy.

For us, with our car? The factory ECU will be fine at first and we would want to get the bugs worked out, but eventually a Nistune board is probably going to be installed. It seems like the most cost effective way to get to our goals without going full engine management.


Tuesday, April 9, 2013

How to build a fuel system.

So we need to take a carb'd car and set it up for fuel injection. This is a large job, but it's more tedious work than actual hard work.

Here's a sketch of what we need to do.


So the idea is to take our stock tank, which has no baffling and use it to feed a surge tank. The surge tank will be a metal tank that holds 1 or 1.5 gallons of fuel and will be pressurized by a low pressure pump. The pressurized surge tank ensures that no matter how hard we throw the car sideways we will always have fuel.

Fuel goes from the surge tank, through a high pressure pump into an adjustable fuel pressure regulator (FPR). This will allow us to set our fuel PSI at the rail to whatever factory settings would be for our engine. Also, when we turn up the boost we can use the FPR to add more fuel to match the increase in air.

The FPR has two outputs. One goes to the fuel rail which will be run in a "deadhead" setup. This means the fuel return does not come off the rail. A fuel rail usually has an input on one side and an output on the other. In this setup it's just an input.

The other port on the FPR is our fuel return which feeds back to the surge tank.

The surge tank will have a fuel return back to the tank.

This is a sealed system that could be used on any car that is carb'd that you want to switch to fuel injection. You just have to find room for everything.

Cost on all this fun? We need hard fuel lines, braided fuel lines, a handful of fittings, a surge tank, two fuel pumps, a FPR, a fuel pressure gauge and maybe a fuel rail. A good rail should come with the engine, but who knows. Cost wise we're looking at $400-500 to set everything up.